A comprehensive cuckoo clock repair manual is essential for restoring and maintaining these intricate timepieces. Packed with detailed instructions‚ photos‚ and diagrams‚ it guides enthusiasts through troubleshooting‚ disassembly‚ and precise repairs‚ ensuring your clock ticks perfectly again.
1.1 Importance of a Repair Manual for Cuckoo Clocks
A repair manual is vital for cuckoo clock owners‚ providing clear guidance for troubleshooting and maintaining these intricate timepieces. With detailed instructions‚ it helps identify common issues like faulty movements or sound mechanisms. The manual ensures proper disassembly and reassembly‚ preventing damage to delicate components. It also offers step-by-step solutions for restoring functionality‚ such as adjusting the pendulum or replacing worn parts. Whether you’re a novice or experienced‚ a comprehensive guide empowers you to preserve the clock’s charm and keep it ticking accurately for years.
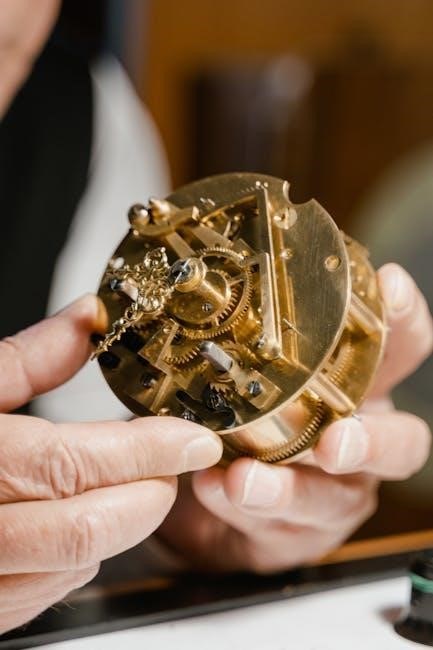
1.2 Overview of the Cuckoo Clock Mechanism
The cuckoo clock mechanism is an intricate system powered by weights that drive the clock’s movement. The pendulum regulates timekeeping‚ while the escapement ensures precise gear movement. The strike train‚ activated by the movement‚ produces the cuckoo sound through bellows. Automaton figures‚ like birds or dancers‚ are often synchronized with the chime. Understanding this mechanism is essential for effective repairs‚ as it relies on the coordination of mechanical components working in harmony to maintain accurate timekeeping and charming animations. Regular maintenance ensures optimal performance.
1.3 Benefits of Using a Step-by-Step Repair Guide
A step-by-step repair guide offers clarity and precision‚ making complex cuckoo clock repairs manageable. With detailed instructions and visual aids like photos and diagrams‚ enthusiasts can navigate intricate mechanisms. The structured approach minimizes errors and saves time‚ providing confidence for successful restoration. These guides cater to both novices and experienced clockmakers‚ ensuring accurate and efficient repairs‚ preserving the clock’s functionality and charm.
Understanding the Basics of Cuckoo Clocks
Grasping the fundamentals of cuckoo clocks is crucial for effective repairs. These charming timepieces combine mechanical precision with artistic craftsmanship‚ offering both functionality and aesthetic appeal to any room.
2.1 History and Evolution of Cuckoo Clocks
The cuckoo clock traces its origins to the Black Forest region of Germany in the 18th century. Initially crafted by skilled clockmakers‚ these timepieces were known for their intricate carvings and mechanical accuracy. Over time‚ cuckoo clocks evolved‚ incorporating advancements in clockwork mechanisms and design. By the 19th century‚ they became popular worldwide‚ blending tradition with innovation. Today‚ they remain a cherished symbol of horological art and cultural heritage‚ with modern models continuing to honor their rich historical roots while embracing contemporary styles and features.
2.2 Key Components of a Cuckoo Clock
A cuckoo clock consists of several essential components‚ including the movement‚ pendulum‚ weights‚ and bellows. The movement powers the clock’s timekeeping and animations. The pendulum regulates accuracy‚ while weights provide energy. The bellows produce the cuckoo sound. Additional features like animated birds or figures‚ known as automatons‚ add charm. Understanding these parts is crucial for effective repair and maintenance‚ ensuring the clock functions smoothly and retains its unique character. Proper care of these components preserves the clock’s heritage and functionality.
2.3 Types of Cuckoo Clocks (Mechanical vs. Quartz)
Cuckoo clocks are primarily available in two types: mechanical and quartz. Mechanical clocks rely on a weight-driven movement‚ requiring regular winding and maintenance. They often feature intricate craftsmanship and animations. Quartz clocks‚ powered by batteries‚ are more accurate and low-maintenance. Mechanical clocks are prized for their traditional appeal and craftsmanship‚ while quartz clocks are ideal for everyday use due to their reliability. Both types offer unique charm‚ catering to different preferences and needs‚ whether for collector value or practicality.
Tools and Materials Needed for Repair
Essential tools include screwdrivers‚ pliers‚ and glasses for intricate work. Materials like lubricants‚ replacement parts‚ and polishing cloths are crucial for effective cuckoo clock restoration and maintenance.
3.1 Essential Tools for Cuckoo Clock Repair
The repair process requires specific tools to ensure precision and safety. Screwdrivers (both flathead and Phillips) are essential for dismantling components. Pliers and cutters help with springs and small parts. A clean workspace with a magnifying glass or loupe aids in examining intricate mechanisms. Lubricants and polishing cloths are vital for maintaining movement and preventing rust. Replacement parts‚ such as gears or pendulums‚ may be necessary for thorough repairs. Always use high-quality tools to avoid damaging the clock’s delicate components during the restoration process.
3.2 Materials Required for Common Repairs
Common cuckoo clock repairs often require specific materials to ensure proper functionality. Lubricants like clock oil or silicone-based sprays are essential for maintaining smooth movement. Cleaning solutions‚ such as mild detergents or alcohol‚ help remove dirt and grime. Replacement parts‚ including gears‚ springs‚ or bellows‚ may be needed to fix worn or damaged components. Polishing cloths are used to restore metal surfaces‚ while adhesives like epoxy or super glue can repair broken casings. Additionally‚ specialized materials‚ such as leather for bellows or brass for bearings‚ may be required for advanced repairs. Always source high-quality materials to ensure durability and precision.
3.3 Safety Precautions When Working with Clock Mechanisms
When repairing cuckoo clocks‚ safety is crucial to avoid injuries and damage. Always disconnect power sources‚ such as removing batteries or winding down springs‚ before starting work. Wear protective gear‚ including gloves and safety glasses‚ to shield against sharp edges or flying parts. Work in a well-lit area to ensure visibility of small components. Avoid using harsh chemicals near open flames‚ and keep flammable materials away. Handle delicate mechanisms with care to prevent breakage. Keeping children and pets away from the workspace is also recommended. Safety ensures a successful and stress-free repair process.

Troubleshooting Common Issues
Identify and resolve issues like inaccurate timekeeping or silent cuckoo sounds by checking pendulum alignment‚ weight levels‚ and mechanism obstructions. Regular maintenance often prevents malfunctions.
4.1 Identifying Common Problems in Cuckoo Clocks
Common issues include inaccurate timekeeping‚ silent cuckoo sounds‚ or a stopped mechanism. These often result from misaligned pendulums‚ uneven weight distribution‚ or worn parts. Regular inspection can reveal dust buildup or loose components. Addressing these problems early prevents further damage. Proper troubleshooting involves checking the escapement‚ strike train‚ and bellows. Consulting a repair manual ensures accurate diagnoses and effective solutions.
4.2 Diagnostic Steps for Clock Malfunctions
Diagnosing cuckoo clock issues involves systematic checks. Start by observing the clock’s behavior‚ noting if it stops‚ runs fast‚ or has a silent cuckoo. Inspect the mechanism for dust or worn parts. Check the pendulum’s swing and weight alignment. Ensure the bellows are unobstructed. Verify the escapement’s proper function and the strike train’s synchronization. Using a repair manual‚ perform these steps methodically to identify the root cause of malfunctions. This structured approach ensures effective troubleshooting and minimizes repair time. Regular maintenance can prevent many of these issues from arising.
4.3 Understanding the Role of the Pendulum and Weights
The pendulum and weights are crucial for a cuckoo clock’s operation. The pendulum regulates the clock’s rhythm‚ ensuring accurate timekeeping. If the clock runs fast or slow‚ adjusting the pendulum length can correct it. Weights‚ typically powered by springs or batteries‚ drive the clock’s mechanisms‚ including the bird’s movement and striking hours. Proper alignment and balance of these components are essential for smooth functionality. Regular checks and adjustments ensure the clock operates efficiently‚ maintaining its charm and reliability over time.
Dismantling the Cuckoo Clock
Dismantling a cuckoo clock requires careful steps to remove key components safely. Start by taking out the weights and pendulum‚ then gently detach the bird and bellows. Use trays to organize small parts and consider taking photos for easy reassembly later. This method ensures no pieces are lost or damaged during the repair process.
5.1 Step-by-Step Guide to Disassembling the Clock
To disassemble a cuckoo clock‚ start by removing the weights and pendulum. Gently lift the bird and its bellows from the front. Next‚ detach the dial and hands‚ taking care not to bend or scratch them. Remove any additional decorative components‚ such as leaves or animals. Use small trays to organize screws and parts. Document each step with photos to aid reassembly. Handle fragile parts with precision‚ ensuring no pieces are misplaced. This systematic approach ensures a smooth and efficient disassembly process.
5.2 Locating and Removing Key Components
When disassembling a cuckoo clock‚ identify the key components such as the dial‚ hands‚ weights‚ and pendulum. Start by gently removing the dial and hands‚ taking care not to bend or scratch them. Next‚ locate the weights and carefully lift them out‚ ensuring the chains are secured. Remove the pendulum by sliding it off its hook. Access the internal mechanism by taking off the back panel‚ using the appropriate tools. Store each part in labeled trays to prevent loss and ensure safe handling of fragile elements. This methodical approach ensures no critical parts are overlooked;
5.3 Tips for Keeping Track of Small Parts
When dismantling a cuckoo clock‚ small parts like screws‚ gears‚ and pins are easy to misplace. Use a small tray or container with dividers to organize components by type or location. Label each section clearly for easy reference. Consider taking photos or notes during disassembly to document where each part belongs. Store tiny items in sealed plastic bags or envelopes to prevent loss. This systematic approach ensures all parts are accounted for and simplifies reassembly‚ saving time and frustration.
Cleaning and Maintaining the Clock
Regular cleaning prevents dust buildup‚ ensuring smooth operation. Use a soft cloth to wipe surfaces and gentle cleaning solutions for intricate parts. Avoid harsh chemicals. Lubricate moving parts.
6.1 Importance of Regular Cleaning
Regular cleaning is crucial for maintaining the functionality and longevity of a cuckoo clock. Dust buildup can obstruct mechanical parts‚ leading to poor timekeeping or complete stoppage. Cleaning prevents corrosion and ensures smooth movement operation. By removing dirt and grime‚ you preserve the clock’s intricate mechanisms and enhance its aesthetic appeal. A well-maintained clock remains accurate and continues to delight with its charming cuckoo sounds. Proper cleaning techniques‚ outlined in repair manuals‚ help protect your clock’s heritage and ensure it remains a treasured timepiece for years to come. Regular maintenance is key.
6.2 Safe Cleaning Methods for Clock Parts
To safely clean cuckoo clock parts‚ use a soft-bristle brush to gently remove dust from visible areas. For delicate components‚ employ a lint-free cloth dampened with distilled water or a mild soap solution. Avoid harsh chemicals or abrasive materials that could damage finishes or harm mechanical parts. Ultrasonic cleaners are not recommended‚ as they may dislodge critical lubricants. Always ensure parts are completely dry before reassembling. Detailed cleaning techniques are often outlined in repair manuals to help enthusiasts maintain their clocks effectively. Proper care ensures longevity and optimal performance.
6.3 Lubrication and Maintenance Tips
Proper lubrication is crucial for maintaining a cuckoo clock’s smooth operation. Use high-quality clock oil sparingly on gears and pivots‚ avoiding over-lubrication‚ which can attract dust and damage mechanisms. Apply oil with a precision dropper‚ ensuring it reaches critical friction points. Re-lubrication is typically needed every 2-3 years‚ depending on usage. Regularly inspect and clean the pendulum and weights to ensure optimal performance. Always follow the manufacturer’s guidelines for lubrication to prevent premature wear and extend the clock’s lifespan. Proper maintenance ensures your cuckoo clock remains accurate and charming for years.

Repairing the Clock Movement
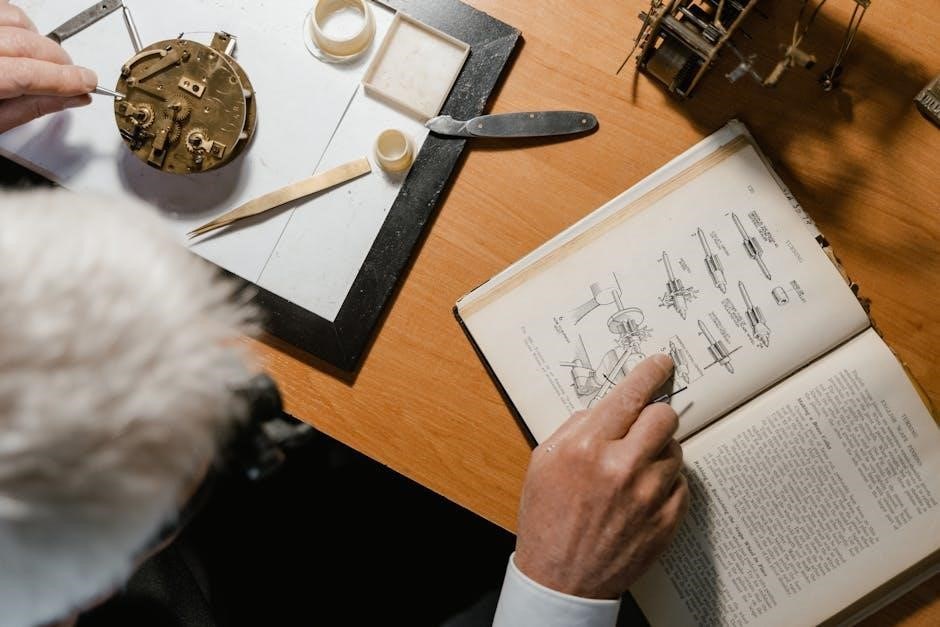
This chapter covers identifying and fixing movement-related issues‚ replacing damaged parts‚ and adjusting for accurate timekeeping. A detailed guide with photos ensures precise repairs.
7.1 Identifying and Fixing Movement-Related Issues
Identifying movement issues in a cuckoo clock involves checking for irregular ticking‚ slow or fast timekeeping‚ and mechanical obstructions. Common problems include worn gears‚ misaligned components‚ or lack of lubrication. To fix these‚ inspect the movement thoroughly‚ clean or replace faulty parts‚ and apply appropriate lubricants. Detailed diagrams in repair manuals guide you through each step‚ ensuring accurate diagnosis and effective solutions to restore smooth operation and precise timekeeping. Regular maintenance can prevent such issues from arising.
7.2 Replacing Damaged or Worn Parts
Replacing damaged or worn parts in a cuckoo clock requires careful identification and precision. Start by inspecting the movement for visible wear or damage. Use a repair manual to locate and source authentic replacement components‚ such as gears‚ springs‚ or bellows. Follow step-by-step instructions to remove the faulty part and install the new one‚ ensuring proper alignment and lubrication. Diagrams in the manual can guide you through intricate replacements‚ ensuring your clock functions smoothly after repair. Always test the clock post-replacement to confirm proper operation.
7.3 Adjusting the Movement for Proper Timekeeping
Adjusting the movement ensures accurate timekeeping in your cuckoo clock. Begin by observing the clock’s behavior over 24-48 hours to identify if it runs fast or slow. Use the repair manual’s guidance to locate the regulating nut or screw‚ typically found near the pendulum. Turn the nut clockwise to slow the clock or counterclockwise to speed it up. Fine-tune in small increments‚ allowing time to assess each adjustment. Refer to diagrams in the manual for precise instructions‚ and lubricate moving parts if necessary to maintain smooth operation.
Reassembling the Cuckoo Clock
Reassembling your cuckoo clock requires patience and care. Follow the repair manual’s step-by-step guide to ensure all components are correctly aligned and functional. Test the clock thoroughly after reassembly to confirm proper operation.
8.1 Reattaching Key Components
Reattaching key components of your cuckoo clock requires precision. Start by securely fastening the movement to the clock’s body‚ ensuring it aligns with the dial. Next‚ reattach the pendulum and weights‚ making sure they hang evenly. The bellows and sound mechanism should be carefully reconnected to restore the cuckoo’s chime. Finally‚ reassemble any decorative elements like carved birds or figures. Always refer to your repair manual for specific instructions to avoid misalignment or damage to critical parts.
8.2 Ensuring Proper Alignment and Functionality
After reattaching components‚ ensure everything aligns correctly. The pendulum should swing freely‚ and weights must hang evenly without touching each other. Verify the bird’s movement is smooth and synchronized with the cuckoo sound. Check the timekeeping accuracy and adjust if necessary. Proper alignment ensures the clock operates flawlessly. Consult your repair manual for specific adjustments to guarantee functionality. Testing the clock thoroughly after reassembly is crucial to confirm all parts work harmoniously.
8.3 Final Checks Before Reassembly
Before reassembling‚ inspect all parts for damage or wear. Ensure springs are properly tensioned and gears are clean. Verify that the cuckoo sound mechanism is functioning and the bird’s wings move smoothly. Check the accuracy of timekeeping and pendulum swing. Make sure all screws and components are securely fastened. It’s crucial to test each function separately to avoid issues after reassembly. Refer to your repair manual for a detailed checklist to ensure everything is in order before putting the clock back together.

Setting Up and Operating the Cuckoo Clock
Setting up your cuckoo clock involves careful hanging‚ leveling‚ and winding. Ensure the clock is securely fastened to the wall and perfectly horizontal for accurate timekeeping. Wind the clock as per the manual’s instructions‚ then set the time and date. Refer to the guide for activating the cuckoo sound and adjusting the pendulum. Proper setup ensures smooth operation and maintains the clock’s charming functionality.
9.1 Hanging and Leveling the Clock
Hanging and leveling your cuckoo clock is crucial for proper operation. Start by locating a sturdy wall hook‚ ensuring it can support the clock’s weight. Hang the clock at eye level to enhance its visual appeal. Use a spirit level tool to ensure the clock face is perfectly horizontal. Adjust the clock slightly until the bubble aligns in the center of the level. Proper leveling prevents uneven weight distribution and ensures the pendulum swings accurately‚ maintaining consistent timekeeping. Secure the clock firmly to avoid any movement or shifting over time.
9.2 Winding the Clock and Setting the Time
To wind your cuckoo clock‚ gently lift the weights and slowly rotate the winding key clockwise. Most clocks require 8-10 turns to fully wind. Once wound‚ carefully set the time by moving the hour and minute hands forward or backward. Avoid forcing the hands‚ as this could damage the mechanism. After setting‚ allow the clock to run for 24 hours to ensure accuracy. Regular winding‚ typically weekly‚ will keep your clock operational and maintain its rhythmic cuckoo sound. Always follow the manufacturer’s instructions for specific winding requirements.
9.4 Activating and Adjusting the Cuckoo Sound
To activate the cuckoo sound‚ ensure the clock is fully wound and the bird mechanism is properly engaged. The cuckoo sound is typically triggered by the clock striking the hour or half-hour. To adjust the sound volume‚ gently tweak the bellows or damping mechanism located near the bird. For optimal performance‚ clean and lubricate the sound mechanism regularly. Adjustments should be made carefully to avoid damaging the delicate components. Proper alignment of the bird and striker ensures clear‚ resonant tones‚ enhancing the clock’s charm and functionality;

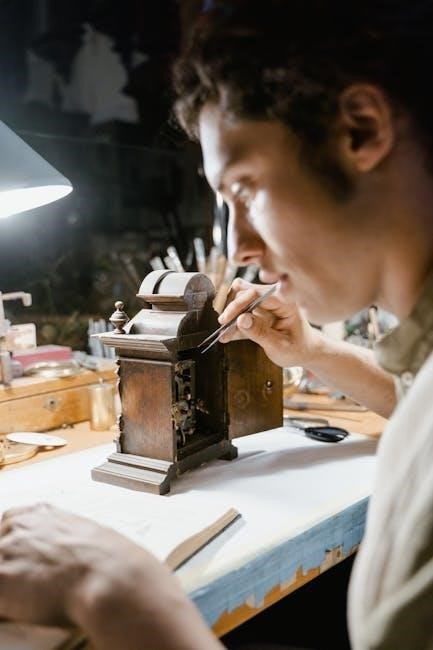
Advanced Repair Techniques
Explore advanced methods to master complex cuckoo clock repairs‚ focusing on restoring bellows‚ automaton figures‚ and intricate sound mechanisms to ensure optimal functionality and longevity.
10.1 Repairing the Bellows and Sound Mechanism
Repairing the bellows and sound mechanism requires precision. The bellows‚ responsible for the cuckoo’s call‚ often need resealing or replacing due to wear. Ensure the sound chamber is clean and free from debris. Proper alignment of the mechanism is crucial for clear sound production. Use specialized tools to adjust or replace damaged components. Referencing a detailed repair manual with diagrams will guide you through this intricate process effectively‚ ensuring your clock’s melody resonates beautifully once more.
10.2 Fixing the Automaton (Moving Birds or Figures)
Fixing the automaton involves carefully inspecting and adjusting the mechanical components that control the moving birds or figures. These parts often require precise alignment and lubrication to function smoothly. Clean any debris and ensure gears are intact. If a part is damaged‚ consider replacing it with an authentic piece. A step-by-step repair manual will provide detailed guidance‚ ensuring the automaton performs its charming movements accurately‚ bringing your cuckoo clock back to life with its delightful animations.
10.3 Advanced Movement Repair Techniques
Advanced movement repair involves specialized techniques for intricate mechanisms‚ such as gear restoration and pivot polishing. These methods require precision tools and a deep understanding of the clock’s inner workings. A repair manual often includes diagrams and step-by-step instructions to guide enthusiasts in diagnosing and fixing complex issues. Proper alignment and lubrication are crucial to restore smooth operation. By mastering these techniques‚ one can preserve the clock’s functionality and maintain its timeless appeal‚ ensuring it continues to keep accurate time for years to come.
Resources and Further Reading
Explore dedicated cuckoo clock repair manuals‚ online forums‚ and professional services to enhance your repair skills and access expert guidance for complex clock mechanisms and restorations.
11.1 Recommended Repair Manuals and Guides
For detailed guidance‚ consider the Step by Step Repair Manual for Cuckoo Clock Owners‚ featuring hundreds of photos and diagrams. Manuals by Bill Tipton and Tom Seaman are also highly regarded. These resources provide in-depth instructions for troubleshooting and repairing various components‚ ensuring your cuckoo clock operates flawlessly. They cater to both DIY enthusiasts and professionals‚ offering practical advice and insights into maintaining these intricate timepieces. Whether addressing mechanical issues or restoring musical elements‚ these guides are invaluable for preserving the craftsmanship of cuckoo clocks.
11.2 Online Communities and Forums
Joining online communities and forums dedicated to cuckoo clock repair can provide invaluable support and resources. Platforms like the National Association of Watch and Clock Collectors (NAWCC) forum or specialized Reddit groups offer a space to share tips‚ ask questions‚ and learn from experienced horologists. These communities often feature threads on troubleshooting‚ parts sourcing‚ and repair techniques. Engaging with fellow enthusiasts and experts can enhance your repair skills and help you overcome challenges. They also serve as a great resource for finding rare manuals or guidance specific to your cuckoo clock model.
11.3 Professional Repair Services
For complex or delicate cuckoo clock repairs‚ consider consulting professional repair services. Experts like Expert Cuckoo Clock Repair By Mail offer worldwide assistance‚ providing meticulous care for your timepiece. These services often include detailed diagnostics‚ precision adjustments‚ and authentic part replacements. Professionals ensure your clock’s intricate mechanisms are restored to optimal function‚ preserving its historical and sentimental value. Their expertise is particularly valuable for rare or heirloom cuckoo clocks‚ ensuring they remain functional and charming for years to come.
Restoring a cuckoo clock is a rewarding experience that preserves its charm and functionality; With the right manual‚ patience‚ and care‚ you can keep these timepieces ticking beautifully for generations.
12.1 Final Tips for Successful Cuckoo Clock Repair
When restoring your cuckoo clock‚ patience is key. Always refer to a detailed repair manual for guidance. Ensure all parts are clean and well-lubricated to maintain smooth operation. Regular maintenance‚ like adjusting the pendulum and replacing worn components‚ will keep your clock accurate and functional. Remember to handle fragile parts with care to avoid damage. By following these steps and staying organized‚ you’ll successfully restore your cuckoo clock to its former glory‚ ensuring it continues to charm for years to come.
12.2 Encouragement to Continue Learning
Embrace the rewarding journey of cuckoo clock repair by continuously expanding your knowledge and skills. With access to comprehensive manuals and online resources‚ you can deepen your understanding of clock mechanisms and restoration techniques. Stay curious‚ experiment with new methods‚ and don’t hesitate to seek advice from experienced horologists. The satisfaction of reviving a timeless piece is unparalleled‚ and each repair project brings new challenges and opportunities for growth. Keep exploring‚ learning‚ and perfecting your craft to become a skilled clock repair enthusiast.
12.3 Importance of Preserving Clockmaking Traditions
Preserving the art of clockmaking ensures the survival of a centuries-old craft. By learning and practicing traditional repair techniques‚ enthusiasts help maintain the cultural significance of cuckoo clocks. These timepieces‚ often handed down through generations‚ embody the skill and dedication of master clockmakers. Repairing and restoring them not only honors their heritage but also passes the knowledge to future generations. Embrace the responsibility of safeguarding this craftsmanship‚ allowing these mechanical marvels to continue delighting and educating people for years to come.