
Ridgid 6 Gallon Air Compressor Manual: A Comprehensive Guide
This guide provides essential information for the Ridgid 6-gallon air compressor, covering safety, operation, maintenance, and warranty details for optimal performance․
Access official manuals from 2017 and 2018, alongside troubleshooting tips, and links to Ridgid’s support resources, including social media platforms․
The Ridgid 6-gallon air compressor (model OF60150HA) is a portable and versatile power tool designed for a wide range of applications, from inflating tires to powering pneumatic tools․ This compressor offers a balance of power and portability, making it suitable for both DIY enthusiasts and professionals alike․
Understanding its features and proper operation is crucial for safe and efficient use․ This manual serves as a comprehensive resource, guiding users through assembly, operation, maintenance, and troubleshooting․ Always prioritize safety by carefully reading and adhering to the provided safety guidelines before operating the compressor․

Proper registration of your Ridgid product is recommended, easily done through the official Ridgid website (register․ridgidpower․com/details/of60150ha), ensuring access to warranty benefits and support․
Model Number and Registration (OF60150HA)
Identifying your Ridgid 6-gallon air compressor’s model number, OF60150HA, is essential for accessing the correct documentation, parts, and support resources․ This number is typically found on the compressor’s data plate, often located on the tank or motor housing․
Registering your compressor at http://REGISTER․RIDGIDAIR․COM is highly recommended․ Registration confirms your ownership and activates the manufacturer’s warranty, providing peace of mind and access to potential service benefits․ The registration process is straightforward and requires basic product information․
Keep a record of your purchase date and model number for future reference․ This information will be necessary when contacting Ridgid customer support or ordering replacement parts․ Proper registration ensures a seamless experience with your Ridgid air compressor․
Accessing the Official Manuals (2017 & 2018 Versions)
Ridgid provides readily available digital copies of the official manuals for the 6-gallon air compressor (OF60150HA)․ These manuals contain crucial safety information, operating instructions, maintenance schedules, and troubleshooting guidance․

The 2017 trilingual manual (English, French, Spanish) can be downloaded from: 2017 Manual․ The 2018 revised version is available at: 2018 Manual․
A further manual, RIDGID 6Gal Manual_(20240517), can be found at: 2024 Manual․ It is strongly advised to review these manuals before operating the compressor to ensure safe and efficient use․

Safety First: Important Guidelines
Prioritize safety by carefully reading all instructions within the manual before operating the Ridgid compressor, ensuring proper use and preventing potential hazards․
General Safety Warnings
Always disconnect the air compressor from the power source before performing any maintenance or adjustments to prevent accidental startup and potential injury․ Never operate the compressor if the power cord or plug is damaged, and ensure proper grounding for electrical safety․
Avoid directing airflow towards yourself or others, and never use compressed air to clean clothing or your body․ Wear appropriate eye and ear protection during operation, as compressed air can create noise and propel debris․
Inspect the air hose and fittings for damage before each use, and never exceed the maximum pressure rating of the compressor or any connected tools․ Keep the work area clean and well-ventilated, and be aware of potential fire hazards associated with flammable materials․

Electrical Safety Precautions
Ensure the power supply voltage matches the compressor’s requirements, as specified on the nameplate, to prevent damage and potential fire hazards․ Always use a grounded outlet and avoid using extension cords unless absolutely necessary; if used, ensure it’s of the correct gauge for the compressor’s amperage․
Never operate the compressor in wet or damp environments, and avoid exposing it to rain or excessive moisture․ Regularly inspect the power cord for any signs of damage, such as cracks or fraying, and replace it immediately if found․
Do not attempt to repair the compressor’s electrical components yourself; instead, contact a qualified technician for any electrical issues․ Always disconnect the compressor from the power source before inspecting or changing any parts․
Pressure Vessel Safety
The air compressor tank is a pressure vessel and must be treated with utmost respect․ Never exceed the maximum pressure rating indicated on the compressor’s nameplate, as this could lead to rupture or explosion․
Regularly drain the tank to prevent corrosion and buildup of moisture, which weakens the vessel over time․ Inspect the tank for any signs of rust, dents, or damage, and discontinue use if any are found․
Never attempt to modify or repair the tank yourself; any alterations could compromise its structural integrity․ Always use approved safety valves and pressure gauges to monitor and regulate the pressure within the tank, ensuring safe operation․

Understanding Your Compressor
Familiarize yourself with the key components, including the tank, pump, motor, and controls, to ensure safe and efficient operation of your Ridgid compressor․
Key Parts Diagram Overview
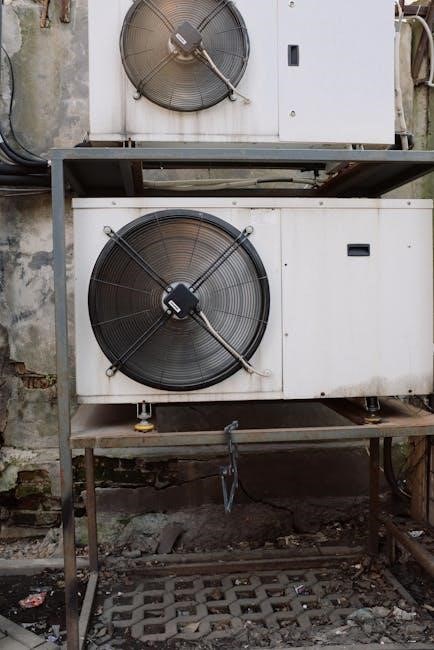
The Ridgid 6-gallon air compressor’s diagram illustrates crucial components for understanding its functionality․ Key elements include the air tank, responsible for storing compressed air, and the electric motor, powering the pump․ The pump itself generates the compressed air, while the pressure switch controls operation based on tank pressure․
Safety features like the pressure relief valve are clearly marked, ensuring safe operation by releasing excess pressure․ The air hose connection allows for tool attachment, and the drain valve facilitates tank maintenance․ Control knobs manage pressure settings, and the power cord provides electrical connection․ Referencing this diagram aids in assembly, maintenance, and troubleshooting, promoting a comprehensive understanding of the compressor’s inner workings․
Component Identification

Identifying each component of the Ridgid 6-gallon air compressor is vital for safe and effective use․ The handle allows for portability, while the rubber feet provide stability․ The air filter prevents debris from entering the pump, ensuring clean air delivery․ The regulator controls output pressure to match tool requirements․
Inspect the quick coupler for secure air tool connections․ The on/off switch controls power, and the power cord delivers electricity․ Familiarize yourself with the pressure gauge, displaying tank pressure․ The drain valve is used for moisture removal․ Understanding these components, as shown in the manual’s diagrams, enables proper assembly, maintenance, and troubleshooting, maximizing the compressor’s lifespan and performance․
Air Hose and Fittings Compatibility
Ensuring compatibility between your air hose, fittings, and the Ridgid 6-gallon compressor is crucial for safe operation and preventing leaks․ This compressor typically utilizes standard ¼-inch NPT (National Pipe Thread) fittings․ Air hoses should possess a compatible connector, often a quick-connect plug․
Always verify the hose’s maximum pressure rating exceeds the compressor’s output․ Using incorrect fittings can lead to dangerous disconnects․ Avoid using damaged or worn hoses, as they pose a safety risk․ Consider using a hose with a built-in pressure regulator for added control․ Proper compatibility guarantees efficient air delivery and minimizes the potential for accidents during operation․
Getting Started: Assembly & Operation
Follow the step-by-step assembly instructions carefully, ensuring a secure power connection before initial use․ Properly fill the tank and operate air tools safely․
Assembly Instructions – Step-by-Step
Before beginning, ensure the compressor is unplugged and the pressure relief valve is open․ Carefully unpack all components and verify everything listed in the parts diagram is present․
First, attach the air filter assembly to the compressor tank, tightening securely․ Next, connect the pressure gauge and regulator assembly, again ensuring a tight fit to prevent leaks․
Attach the handle, if included, using the provided hardware․ Finally, inspect all connections for tightness and proper alignment․ Refer to the official manual (available at manuals․ttigroupna․com) for detailed diagrams and specific torque specifications․ Always double-check your work before proceeding to the initial setup․
Proper assembly is crucial for safe and efficient operation․
Initial Setup and Power Connection
Before powering on, verify the compressor is assembled correctly and all connections are secure․ Ensure the pressure relief valve is closed․ Connect the compressor to a grounded, 120V electrical outlet – never use an extension cord unless absolutely necessary, and if so, use a heavy-duty cord․
Allow the compressor to run for approximately 30 minutes to break in the motor․ During this initial run, listen for any unusual noises or leaks; The tank will gradually fill with air; do not exceed the maximum pressure rating (printed on the tank)․
Register your Ridgid product at register․ridgidair․com for warranty coverage․ Refer to the manual for specific electrical safety precautions․
Operating Instructions: Filling the Tank
To fill the tank, ensure the power switch is in the “ON” position․ The compressor will automatically begin to pump air into the tank․ Monitor the pressure gauge; the compressor will cycle on and off to maintain the pre-set pressure․ Avoid continuous operation at maximum pressure for extended periods, as this can reduce the compressor’s lifespan․
Listen for the motor to cycle on and off․ This indicates the compressor is functioning correctly․ If the compressor runs continuously without building pressure, check for leaks in the air hose or fittings․ Never operate the compressor with a damaged air hose or fittings․
Allow the tank to fully pressurize before connecting air tools․ Refer to the manual for recommended pressure settings for various tools;
Operating Instructions: Using Air Tools
Before connecting any air tool, ensure the compressor tank is fully pressurized and the pressure regulator is set to the appropriate PSI for the tool․ Always check the tool’s manual for its recommended operating pressure․ Connect the air tool’s hose to the quick-connect coupler on the compressor․
Always wear appropriate safety glasses and hearing protection when operating air tools․ Be mindful of the tool’s exhaust port and avoid directing it towards yourself or others․ Never exceed the maximum pressure rating of the air tool․
Monitor the compressor’s pressure gauge while using the tool․ The compressor will cycle on as needed to maintain pressure․ Disconnect the tool and drain the tank when finished․

Maintenance and Troubleshooting
Regular maintenance, including draining the tank and cleaning the air filter, ensures optimal performance․ Address issues like low pressure or leaks promptly․
Routine Maintenance Schedule
Maintaining your Ridgid 6-gallon air compressor is crucial for longevity and performance․ A consistent schedule prevents issues and ensures reliable operation․ Daily, after each use, drain the tank completely to prevent corrosion․ Weekly, inspect the air filter for debris and clean or replace it as needed – a dirty filter restricts airflow and reduces efficiency․
Monthly, check all air hoses and fittings for leaks, tightening connections as necessary․ Inspect the compressor oil level (if applicable to your model) and top up if low․ Annually, consider a more thorough inspection, potentially by a qualified technician, to assess internal components and ensure optimal functionality․ Following this schedule will minimize downtime and maximize the lifespan of your compressor․
Draining the Tank – Procedure & Frequency
Regularly draining the tank is vital to prevent rust and corrosion within your Ridgid 6-gallon air compressor․ The procedure is simple: first, disconnect the power supply and release any remaining air pressure․ Locate the drain valve, typically at the bottom of the tank․
Place a container beneath the valve to catch the water․ Open the valve and allow all condensation to drain completely․ Close the valve securely․ Frequency depends on usage – daily draining is recommended for frequent use, while at least weekly draining is advised for occasional use․ Neglecting this step can significantly shorten the compressor’s lifespan and compromise its performance․
Air Filter Cleaning and Replacement
Maintaining a clean air filter is crucial for optimal compressor performance and longevity․ A dirty filter restricts airflow, reducing efficiency and potentially damaging the pump․ Regularly inspect the air filter for dirt and debris․
For foam filters, gently wash with mild soap and water, rinse thoroughly, and allow to dry completely before reinstalling․ Paper filters should be tapped gently to remove loose particles; replacement is recommended when visibly soiled․ Refer to your manual for the correct filter type․ Replacing the filter ensures clean air intake, protecting the internal components and maintaining consistent air pressure․
Troubleshooting Common Issues (Low Pressure, Leaks)
Low pressure often indicates a dirty air filter, restricting airflow to the pump – clean or replace it․ Check for air leaks around fittings, hoses, and the tank using a soapy water solution; bubbles reveal leak points․ Ensure the pressure switch is functioning correctly and set to the desired pressure․
If the compressor runs constantly without reaching pressure, a faulty check valve might be the culprit․ Inspect the check valve for proper sealing․ For persistent issues, consult the official Ridgid manual or contact customer support․ Always disconnect the power supply before attempting any repairs or inspections to ensure safety․

Warranty Information & Support
Ridgid offers a comprehensive warranty on its 6-gallon air compressors; access details via registration and online resources for support and assistance․
Ridgid Warranty Details
Ridgid stands behind its 6-gallon air compressor with a robust warranty program designed for peace of mind․ While specific terms can vary, generally, Ridgid offers a Lifetime Service Agreement on its tools, including this compressor, upon registration within 30 days of purchase․
This agreement covers defects in materials and workmanship for the life of the tool, provided it’s used for its intended purpose․ Registration is crucial to activate this benefit; visit http://REGISTER․RIDGIDAIR․COM to register your product․
The warranty doesn’t cover damage resulting from misuse, abuse, or normal wear and tear․ Keep your proof of purchase for warranty claims․ Detailed warranty information is available on the Ridgid website and within the official product manuals․
Contacting Ridgid Customer Support
For assistance with your Ridgid 6-gallon air compressor, several support channels are readily available․ Ridgid’s customer support team can address questions regarding operation, maintenance, warranty claims, and troubleshooting․
You can connect with Ridgid through their official social media platforms: Facebook, Twitter, and Instagram․ Additionally, a comprehensive playlist of helpful videos can be found on YouTube․
For direct assistance, visit the Ridgid website or consult the manuals for contact numbers and email addresses․ Having your model number (OF60150HA) ready will expedite the support process․ Ridgid is committed to providing excellent customer service․
Online Resources (Social Media & YouTube)
Ridgid provides a wealth of online resources to support your 6-gallon air compressor experience․ Stay connected and informed through their active social media presence․
Find helpful tips, project ideas, and community discussions on Facebook, receive updates and announcements on Twitter, and view visual inspiration on Instagram․
For detailed visual guidance, explore the official Ridgid YouTube playlist dedicated to their tools, which likely includes tutorials relevant to your air compressor․ These platforms offer a dynamic way to learn and troubleshoot, supplementing the information in your manual․